
How to Publish to Webflow CMS Without Manual Copy-Paste
✅ How to publish to Webflow CMS without manual copy-paste quick guide
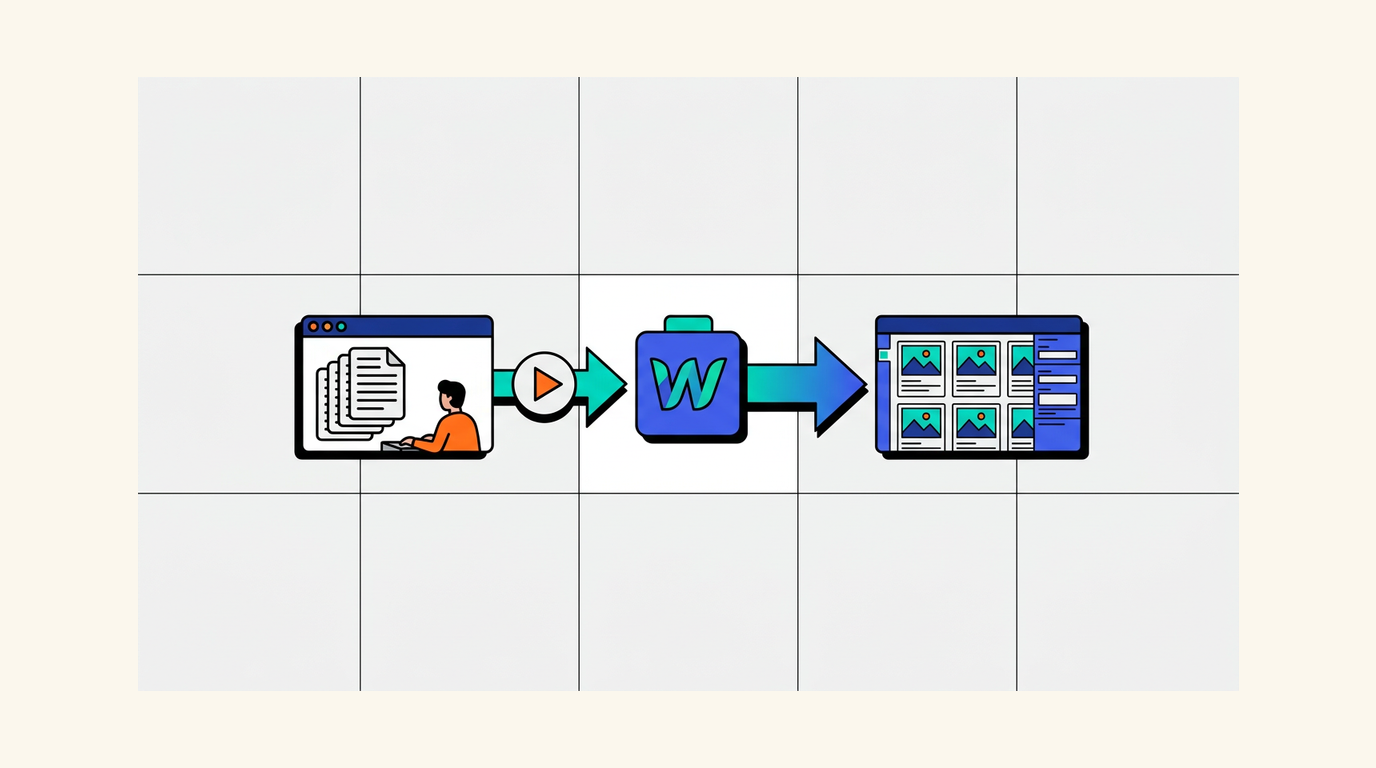
How to Publish to Webflow CMS Without Manual Copy-Paste
You finish writing a blog post in Google Docs. It looks clean. The formatting is right, the slug is logical, the meta description is tight. Then you open Webflow, create a new CMS collection item, and spend 20 minutes copying fields one by one. Title. Body. Excerpt. SEO title. Meta description. Slug. Featured image. Category. Author. Every single time.
That process works fine for 2 posts a week. At 8 posts a week, it becomes a part-time job. At 20, it breaks entirely. Not because the work is hard, but because it is repetitive, error-prone, and completely manual.
Publishing to Webflow CMS without manual copy-paste is a content operations decision. This article walks through how to publish to Webflow CMS without manual copy-paste, which path fits your team's volume, and where automated workflows fail before they reach the publish button.
Why manual Webflow CMS publishing breaks at scale
The fields you move by hand
Every CMS collection item in Webflow has fields. A typical blog post has 8 to 10: title, slug, body (rich text), excerpt, featured image, SEO title, meta description, author, category, and publish date. Moving all of those by hand means 8 to 10 separate copy-paste actions per post.
At 5 posts a week, that is 50 manual field entries. At 20 posts a week, it is 200. None of those actions add editorial value. Pure transfer cost.
Where the errors actually happen
Formatting drift is the most common failure. Rich text copied from Google Docs into Webflow's editor often carries hidden span tags, inconsistent heading levels, or smart quotes that break downstream rendering. Broken links follow close behind, especially when internal links reference staging URLs instead of production ones.
Missing alt text is another consistent gap. When images are uploaded manually during a rushed publishing session, alt text gets skipped. Slugs drift too: one editor writes how-to-use-webflow, another writes webflowHowTo, and the inconsistency compounds over 50 posts.
The real cost is checking, not typing
The hidden expense is not the copy-paste itself. It is the QA loop afterward. Someone has to verify every field before hitting publish. That verification step takes 5 to 10 minutes per post. For a team publishing 15 articles a month, that is 75 to 150 minutes of checking work that produces nothing new.
If every post needs a human relay race across 10 fields, the process is already too expensive to scale.

What Webflow actually gives you natively
CMS collections and the standard publish flow
Webflow's CMS Collections let you define a schema once and create items against it. Each collection item can be saved as a draft or published immediately. Webflow University documents the full build, manage, and publish cycle for CMS content, and it is genuinely clean inside the editor.
The native flow works well when your content originates inside Webflow. It is less suited when your content lives somewhere else first.
Staging versus custom domain publishing
Webflow lets you publish to either a staging subdomain or a custom domain from the Designer or Site Settings. Staging is useful for review. Custom domain is what goes live. That distinction matters for automation: you want to push to draft or staging first, then trigger a separate publish step after QA.
Where native Webflow stops helping
Webflow is strong at presentation and templating. It is not built for content ingestion. If your editorial process starts in Notion, Airtable, or Google Docs, the native editor gives you nowhere to land that content without manual transfer. The standard Webflow publish workflow assumes the content is already inside Webflow. That assumption is where content teams run into friction.
Webflow handles the last mile beautifully. Getting content there is a separate problem entirely.
The manual workflow teams use today
The relay race in practice
The typical workflow looks like this: draft in Google Docs or Notion, get editorial approval, open Webflow, create a new CMS item, copy the title, paste the body into the rich text editor, fix the formatting, add the slug manually, fill in the SEO fields, upload the featured image, assign the category, set the author, save as draft, preview, then publish. That is 14 to 16 discrete steps for one post.
The repeated steps that drain time
Three steps repeat on every single post regardless of content: formatting correction after paste, slug creation, and SEO field entry. These are not creative steps. They are data entry. A team of 2 content people spending 25 minutes per post on transfer and QA loses roughly 8 hours a month to pure overhead at 20 posts per month.
A basic manual QA checklist
Before any post goes live manually, a reliable checklist covers at least these items:
- Slug is lowercase, hyphenated, and matches the target keyword pattern for this content type.
- SEO title is under 60 characters and does not duplicate the H1 verbatim.
- Meta description is under 155 characters and contains no promotional filler language.
- Featured image has an alt text entry that describes the image specifically.
- All internal links point to production URLs, not staging or Doc links.
- Rich text headings are H2 and H3 only, with no accidental H1 tags inside the body.
- Category and author fields are assigned, not left blank.
Running this checklist manually on every post is where the 5 to 10 minutes per post goes. Automating the upstream field population makes this checklist faster to run, even if you keep it human.
Three automation paths: Zapier, API, or bulk-publish tools
No-code with Zapier or Make
Zapier can connect a source system like Airtable, Google Docs, or Notion to a Webflow CMS collection and map fields automatically. You define the trigger (a new row in Airtable, a new document in a folder), map each source field to its Webflow counterpart, and the Zap creates a draft CMS item without you touching the editor.
Setup takes roughly 30 to 60 minutes for a simple schema. It works well when the content structure is stable and the field count is under 12.
API-based workflows for higher volume
Webflow's REST API accepts POST requests to create CMS collection items programmatically. You authenticate with a Webflow API token, send a JSON payload with your field values, and the item is created in draft state. A separate API call publishes it.
API-based automation handles branching logic, retries on failure, conditional field mapping, and bulk operations that no-code tools struggle with. The trade-off is that someone on the team needs to write and maintain the integration code, or use a platform that abstracts it.
Bulk-publish tools built for content operations
Tools like the workflow described by SaaS Hackers for bulk-publishing AI content to Webflow CMS sit between no-code and raw API work. They provide a UI for field mapping, a queue for batch publishing, and a draft-before-live gate. These are worth evaluating when volume exceeds 15 to 20 posts per month and the Zapier approach starts hitting rate limits or field complexity walls.
| Path | Best for | Setup time | Field complexity limit | Maintenance burden |
|---|---|---|---|---|
| Zapier / Make | Simple schemas, <10 posts/week | 30-60 min | Low to medium | Low |
| Webflow API | High volume, custom logic | 2-8 hours | High | Medium to high |
| Bulk-publish tools | AI content ops, 15+ posts/week | 1-3 hours | Medium to high | Low to medium |
A practical setup for publishing without copy-paste
Choose a single source of truth
Pick one system where content lives before it reaches Webflow. Airtable works well for structured content with multiple fields. Google Docs works if your team already drafts there and you use the Webflow Google Docs integration for simpler syncs. Notion works if your editorial calendar already lives there. The source does not matter as much as the discipline of using only one.
Splitting content across 3 different source systems is how automation breaks. Pick one and standardize around it.
Map every field before you build anything
Before writing a single Zap or API call, list every Webflow CMS field and its corresponding source field. A typical mapping for a blog post looks like this:
- Webflow Name field maps to the article title column in your source system.
- Webflow Slug field maps to a dedicated slug column, pre-formatted as lowercase-hyphenated.
- Webflow Body (rich text) maps to the body column, exported as clean HTML.
- Webflow SEO Title maps to a separate SEO title column, not the article title.
- Webflow Meta Description maps to its own column, capped at 155 characters upstream.
- Webflow Featured Image maps to a public image URL, not a local file path.
- Webflow Category maps to a reference field matched by slug or ID.
Doing this mapping on paper before touching any tool saves hours of rework later.
Keep drafts separate from live publishing
Every automated workflow should create items in draft state first. A separate manual or automated trigger handles the publish step after a human has reviewed the draft in Webflow's staging environment. This separation is the most important safeguard in any automated publishing pipeline. It costs almost nothing to implement and prevents live publishing of broken content.
Good automation starts with field mapping, not with prompts. Build the schema first; the tooling follows.
How to prevent broken rich text, images, and SEO fields
Rich text is the most failure-prone field
Webflow's rich text field accepts HTML, but it is particular about what HTML it accepts. Copying from Google Docs pastes in span tags, font-size inline styles, and color attributes that Webflow either strips or renders inconsistently. The fix is to export or convert body content to clean HTML before it enters the pipeline. Tools like Mammoth.js (for Docs-to-HTML conversion) or a simple HTML sanitizer strip the noise before the field is populated.
In my experience, roughly 60 to 70 percent of formatting bugs in automated Webflow publishing trace back to dirty HTML in the body field, not to the automation logic itself.
Images need public URLs, not local paths
Webflow's CMS API does not accept file uploads directly in the same request as item creation. Images must be hosted at a public URL before you reference them in a CMS item. That means uploading images to a CDN, an S3 bucket, or Webflow's own asset library first, then passing the URL into the image field. Any workflow that tries to pass a local file path or a Google Drive sharing link will fail silently or produce a broken image field.
Standardize slugs and SEO fields upstream
Slug errors are easy to prevent and painful to fix after publishing. A slug column in your source system should enforce a consistent format: lowercase, hyphens only, no trailing slashes, no special characters. Apply this rule at the source level, not inside Webflow. The same logic applies to SEO titles and meta descriptions: enforce character limits in the source system so the fields are already valid before they reach Webflow. Fixing these downstream, one item at a time, is exactly the kind of manual work automation is supposed to eliminate.
Automate mess faster and you just get more mess. Standardize slugs, alt text, and metadata upstream before the pipeline touches Webflow.
When no-code is enough and when you need API control
The case for no-code
No-code automation (Zapier, Make, n8n) is enough when three conditions are true: the publishing schema has fewer than 12 fields, the content volume is under 10 posts per week, and the workflow does not require conditional logic or retry handling. If you can describe the entire process in 3 steps (new row in Airtable triggers a Webflow draft, fields map 1-to-1, done), no-code will handle it reliably and the setup cost is low.
The Zapier and API guide from seo.tenten.co covers both paths and is worth reading before committing to either.
When the API becomes necessary
API-based automation earns its complexity when volume rises above 15 posts per week, when the schema has reference fields that need ID lookups, or when publishing logic branches based on content type. It is also the right choice when you need to handle failures gracefully: retry on a 429 rate-limit response, log failed items separately, or trigger a Slack alert when a publish step does not complete within 30 seconds.
No-code tools struggle with all of these. They fail silently, retry unpredictably, and give you limited visibility into what broke and why.
A plain decision rule
If your workflow can be described in 3 steps and your schema is stable, start with no-code. If you need branching rules, field ID lookups, retry logic, or you are publishing more than 15 items per week, reach for the API. Do not over-engineer the first version. Start simple, measure what breaks, then upgrade the architecture.
The fastest next move for a SaaS content team
Start with one content type
Do not try to automate your entire editorial operation on day one. Pick the single most repetitive content type: weekly roundups, product update posts, or SEO-driven how-to articles. Build the field mapping for that type only. Run 5 posts through the automated pipeline before expanding it. This limits the blast radius when something breaks and gives you a clean proof of concept to show the rest of the team.
Measure what actually changes
Three numbers tell you whether the automation is working: time saved per post (target: reduce from 20 minutes to under 5 minutes of human touch), error rate per 10 posts (target: under 1 field error per 10 items), and publish consistency (target: all posts have slug, SEO title, meta description, and alt text populated before going live). Track these for the first 4 weeks. If the numbers move in the right direction, scale the pipeline. If they do not, the problem is upstream in the field mapping or source data quality, not in the automation tool itself.
Think of it as an operations upgrade, not a tech project
The goal is not faster typing. It is fewer publishing handoffs. Every handoff is a potential error, a delay, and a drain on someone's attention. An automated pipeline that moves a post from approved draft to Webflow CMS item in under 2 minutes, with every field populated correctly, is an operations upgrade. It frees the content team to write more and check less. That is the actual return on the setup time.
If you are building a recurring organic traffic operation and want to understand how this fits into a broader content stack, the AI blog publishing for SaaS: manual workflow vs automation breakdown covers the wider decision framework.
Frequently asked questions
Can I publish to Webflow CMS without writing code?
Yes. Zapier and Make both support Webflow as a native integration. You can connect a source like Airtable or Google Sheets, map fields to a Webflow CMS collection, and create draft items automatically without writing a single line of code. The limitation is that no-code tools handle simple schemas well but struggle with reference fields, bulk operations over 100 items, or conditional publishing logic.
What is the difference between publishing to staging and publishing to a custom domain in Webflow?
Publishing to staging pushes your changes to a yoursite.webflow.io subdomain for review. Publishing to a custom domain makes changes live on your production URL. For automated pipelines, the recommended pattern is to create items as drafts, review on staging, then trigger a separate publish step to the custom domain only after QA is complete.
Why does rich text break when I automate Webflow CMS publishing?
Webflow's rich text field is selective about HTML. Content copied from Google Docs or pasted from a word processor carries inline styles, span tags, and font attributes that Webflow strips or renders inconsistently. The fix is to sanitize the HTML before it enters the pipeline. Convert the body to clean HTML with only semantic tags (p, h2, h3, ul, li, a, strong, em) and strip all inline styles before sending the field to Webflow.
How do I handle images in an automated Webflow CMS workflow?
Images must be at a publicly accessible URL before you reference them in a CMS item via the API or a no-code tool. Upload images to a CDN, AWS S3, or Webflow's own asset library first, then pass the resulting URL into the image field. Passing a local file path or a private Google Drive link will result in a broken image field every time.
When should I use the Webflow API instead of Zapier for CMS publishing?
Use the API when you are publishing more than 15 items per week, when your schema includes reference fields that need ID lookups, or when you need retry logic and failure logging. Zapier is faster to set up and sufficient for simple, low-volume workflows. The API gives you full control but requires someone to write and maintain the integration code.
Ranksector Blog
Try Ranksector Blog to go from approved draft to published Webflow CMS item without touching the editor. Start with your most repetitive content type, map your fields once, and let Ranksector Blog handle the transfer, formatting, and publish step. See how much of your weekly publishing overhead disappears.